4. Adding some sound!
We are going to add three sounds. A game starting sound of the pilot talking, an explosion when the player dies and the sound of the aircraft engine. You can download all of them below. Two of them were free on the Internet distributed with an attribution license (such a license allows for free use so long as credit is given). The engine sound is one we created ourselves. We’ll explain exactly how we did this in Issue 6 when we cover some basic audio editing.
- Download pilot talking. Credit to shawshank73.
- Download explosion. Credit to NoiseCollector.
- Download engine sound. We will explain how we made this sound in Issue 6.
(you may need to right-click/save-as depending on your browser/operating system)
Save the files in a new sub-directory called ‘sounds’ under your volume1 directory. The code changes to add the sounds to the game are as follows.
In game.py, at the end of the constructor, add:
        newGameSound = base.loader.loadSfx("volume1/sounds/gamestart.wav")
        newGameSound.play()
…this will result in the pilot sound file playing when the game is first launched. In player.py add the following to the constructor:
        self.engineSound = base.loader.loadSfx("volume1/sounds/engine1.wav")
        self.engineSound.setVolume(self.__speedAsPercentage())
        self.engineSound.setLoop(True)
        self.explosionSound = base.loader.loadSfx("volume1/sounds/explosion.wav")
It is vital to place the above code before the call to player.reset. As you will see momentarily, player.reset will be updated and will depend on the sound existing! The code above loads the engine sound and then sets the volume relative to the player speed. The idea is that the faster you fly the louder the engines are. We also call ‘setLoop’ to make the sound constantly play. It is around 5 seconds in length but we just repeat it over and over for a constant sound. Lastly, we load the explosion sound but do not play it (because the player hasn’t died yet!).
Add the following two lines to the end of the player reset method:
        self.engineSound.setVolume(self.__speedAsPercentage())
        self.engineSound.play()
At the end of the accelerate method:
self.engineSound.setVolume(self.__speedAsPercentage())
At the end of the brake method:
self.engineSound.setVolume(self.__speedAsPercentage())
In the die method, just before the setZ call:
            self.engineSound.stop()
            self.explosionSound.play()
Run the game and you should now find you have an introduction sound, a varying engine sound (varies by speed) and an explosion sound when you crash. Simples. 🙂
5. Adding a basic Heads Up Display (HUD)
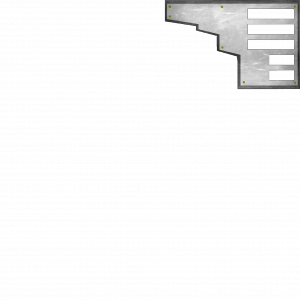
You will need the two images below. To download, first click the image so the zoomed version appears on this page, then right-click and save. One is for an on screen RADAR, the other is a game information panel. Save them in a new sub-directory under volume1 called ‘gfx’.
Thanks to Zero Point Productions for providing the HUD images!
In the volume1 directory create a new Python file called gui.py, contents are as follows:
from direct.gui.DirectGui import DirectFrame, OnscreenImage
from pandac.PandaModules import TransparencyAttrib

class GameGUI():
    def __init__(self,render2d):
        self.render2d = render2d

        # image scale of 1 fills screen, position defaults to central
        Scale = 1.0/2.5 # decimal point is VITAL
        radar = OnscreenImage(image='volume1/gfx/radar.png', scale=Scale, \
                                parent=self.render2d, pos=(-0.95,0,-0.95))
        radar.setTransparency(TransparencyAttrib.MAlpha)
        # note the image itself and how it is centered

        hud = OnscreenImage(image='volume1/gfx/hud.png', scale=1, \
                                parent=self.render2d, pos=(0,0,0))
        hud.setTransparency(TransparencyAttrib.MAlpha)
Now edit game.py and add this import:
from .gui import GameGUI
Then add this in the ArcadeFlightGame constructor:
self.gui = GameGUI(self.render2d)
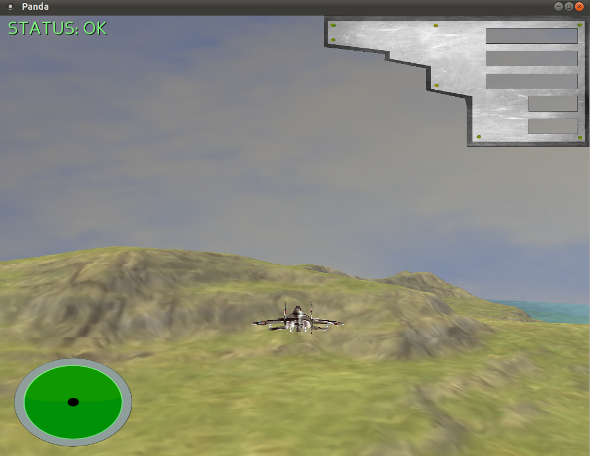
Run the game and you should see something like the below:

None of it works yet – there’s nothing on the RADAR and nothing on the information panel. All in good time! We’ll explain how the GUI code above works in Issue 6.
6. The Water from Issue 4
        # water
        self.water = self.loader.loadModel('volume1/models/square.egg')
        self.water.setSx(self.worldsize* 2)
        self.water.setSy(self.worldsize*2)
        self.water.setPos(self.worldsize/2,self.worldsize/2,18) # sea level
        self.water.setTransparency(TransparencyAttrib.MAlpha)
        nTS = TextureStage('1')
        self.water.setTexture(nTS,self.loader.loadTexture('volume1/models/water.png'))
        self.water.setTexScale(nTS,4)
        self.water.reparentTo(self.render)
        LerpTexOffsetInterval(self.water, 200, (1,0),(0,0), textureStage=nTS).loop()
We didn’t explain in Issue 4 how the new water works. The code above loads a small 1×1 square. It then scales it to be double the size of the world (hence there is water beyond the terrain). A transparency is set which is why the terrain can be seen through the water. A texture is then loaded and applied. This is done using a TextureStage. Do not worry about this for now, texture stages will be covered in the future. There isn’t really a ‘stage’ in this instance anyway as there is only one texture! Lastly, a lerp interval is set to move the water texture by an offset. This is the animation effect you see. Again, do not worry about this for now – there’s a whole Issue of content to cover when we reach intervals in detail!
7. What are these new files I see before me?
If you look in your ‘volume1’ directory you will see a number of new files ending with the extension ‘pyc’. What are these? Refer back to our discussion of interpreted and compiled languages in Issue 4. We pointed to Java as a ‘somewhere inbetween’ solution. In some ways, Python is too. Although it is an interpreted language, it is smart enough to compile a version of a Python file. The pyc file is a ‘byte-compiled’ version of the py file. If you edit/change your Python code, the interpreter will rebuild the necessary pyc file. If you don’t, the next time you play the game Python will only load the pyc file – it has no need to read and recompile the py source code. This is just a trick to allow for faster loading of a program. Execution speed is actually no different. Notice Python only does this for your ‘package’ files. It leaves your main.py alone, treating it as input to the interpreter (in other words, the actual Python script you execute is never compiled to a pyc).
8. Wrap up and Summary
That’s all for another Issue! We hope you enjoyed Issue 5 of MGF Magazine. Aside from the “fun stuff” (the sound and the HUD) there are some important concepts that have been covered. Again, to reiterate:
- An object has: Behaviour, Identity, State
- Object oriented offers: Inheritance, Encapsulation, Polymorphism
- Object oriented design encourages: Reuse, Extensibility and Maintainability
- Design while being conscious of: Coupling and Cohesion
…that’s pretty much modern software engineering in a nutshell! Portability (cross-platform) is also a good quality to aim for. Thankfully, we have that covered by our choice of programming language and game engine – Python and Panda3D, both of which are cross-platform.

